Monday, July 2, 2012

What the heck are you doing?


I've been spending a little less time at the metalsmithing bench lately.  I had a great idea for a project - still jewellery, still opulent in the typical "Gracebourne" style - but made out of something softer, something more pliable and delightfully tactile - leather!!

I came to the realization that my style of jewellery, while detailed (sometimes intricately) is fairly one-dimensional.  I spend a lot of time just sawing away at a flat sheet of metal - sometimes I give that metal a bit of a curve, maybe I set a stone in it, give it a nice patina or enamel it all over - but the style remains the same:  negative space sawn out, metal shape left over.  I decided that this particular style would lend itself beautifully to a laser cutter upon leather.  All I had to do was learn some graphic design basics.


Everything starts with a sketch.
One of the most important techniques I learned in art school was project planning.  Before I had this skill set firmly in place, I would start off with a vague idea of what I wanted to do, and I would take a circuitous and often frustrating path to get to the finish line.  The result was rarely what I envisioned.  I have swept this wishy-washy approach to creation out the door!  Now, everything begins with a sketch in the notebook and a clear idea of where I want to go and how to get there.

I cannibalized old notebooks for semi-discarded sketches and I used existing patterns from my metalsmithing, and I photographed everything.  I downloaded an open source graphic design program and set about learning how to use it to trace my drawings.  It took a while for me to get going with the computer program, but it was a lot of fun to learn, and, best of all, I could do it away from my bench - in a coffee shop, the library, or in the park.

Hard to believe this came from my sketch!


Next step was shopping for the leather.  I really had no idea what to look for.  But I had a basic idea of colour, and I didn't go crazy and buy too much because this is a trial run.  I bought two large pieces in basic black and basic white, and a few smaller pieces for accents.  I printed out some paper maquettes of a few of my designs, to check scale and layout.

Laying out paper maquettes on my leather pieces
The next thing to do before sending it to be laser-cut is to make sure all of my electronic files are in order.  They have to be neat and everything has to fit within the leather economically - I don't want to waste anything!  I realized that some pieces needed a redesign because they were either too complex (always my designer's achilles heel) or they contained lines that were too thin and would be too fragile for leather.  What can I say, I'm used to designing for metal!

You'll have to stay tuned to find out how it all turns out.  Give me a few more weeks and this project will be in full swing!  Until then, here is a cute picture of me modelling my "parentica aspasia" headband maquette!


My biceps are huge.  Yoga, people.  Do it.

I'm not the only one with new and exciting stuff going on.  Please check out my fellow etsymetal team members' blogs to find out what's happening with them, too!

 Laney Clark of Silentgoddess
 Evelyn Markasky
 Victoria Takahashi of Experimetal
 Beth Cyr
 Rebecca Bogan of Adobe Sol Designs
 Ann Walker
 Erin Austin
 Danielle Miller
 Nodeform

Wednesday, May 23, 2012

Xocolatl!

I had to leave my house today and walk up to Broadway to buy some saw blades for a custom order.  It was dismal, misty, windy, and cold.  It reminded me of Vancouver, or of Japan in the rainy season - both places I don't mind being reminded of.  When I lived in Japan and I caught a chill, I would take a trip to the Japanese Denny's for hot chocolate - but this was no water and powder mixture.  Imagine that part in Charlie and the Chocolate factory when they are going down the chocolate river in a boat and Willy Wonka reaches overboard to fill a mug for Charlie.  So think and delicious and warm.  I had dreams all my life of drinking such a beverage, and I believe I finally found it in Japan.  In Vancouver, there was a Spanish Chocolate restaurant, now closed, around the corner from my apartment.  They had thick hot chocolate with chili peppers and cinnamon.  It blew my mind.  Today I was cold after my walk and missing the places I used to live, and I decided to do some experimenting and make some hot chocolate like the stuff I used to drink in Japan and in Vancouver.  Here is my recipe.


Xocolatl

1 cup whole milk
1/2 tsp corn starch
1 bar of chocolate - Jersey Milk or Dairy Milk are good choices, Caramilk could work in a pinch, but that would change the whole drink into something else - worth a try.
Cayenne pepper and Cinnamon to taste

1. Finely grate the chocolate with a cheese grater.
2. Whisk the milk and corn starch together in a small saucepan
3. On medium heat, bring milk to a boil, stirring ocassionally.
4. Remove from heat and add chocolate and a pinch of cayenne to taste.  Stir until chocolate is melted.
5. Put the pan back on the element, but lower the heat slightly.
6. Stir the mixture frequently but not vigorously, until it thickens, then remove from heat and pour into a mug.
7. Top with whipped cream.  I made a mixture of about 1/8 tsp each of cinnamon and cayenne and sprinkled this over the top of my drink.  It was amazing. 

I would say I'm now ready to get back to my jeweller's bench and start working, but I feel more like a nap is in order.

Photo credit:  chowtimes.com

Monday, April 2, 2012

Trial By Fire : How I Learned to Solder


This week's blog is a part of Etsy Metal's Blog Carnival.  The topic?  "Nobody's Perfect" - a statement that certainly applies to me, despite my most fervent wishes to the contrary!


We are told that everyone has a different learning style.  My style is to learn by making mistakes.  I get frustrasted when things don't go my way, but often when I'm sitting at my bench fuming, considering throwing something and swearing loudly, I try to gently remind myself that a mistake is the best way to learn a lesson.  If everything was easy and came together without a challenge, would we really ever make anything that we could say we are proud of?  I don't think so.

I learned to solder in my first month of art school by making a curb chain.  My instructor was not into starting us off with an easy project.  The students in my class each had a one ounce coin of pure silver, and that coin was to be transmuted into the chain you see above, with a 'sister hook' clasp.  Alloying the metal, and fabricating the wire and sheet was new to me, but fairly easy.  The hard part came with the soldering.

Using only hard solder (upon insistence by our instructor) we soldered each link of the chain, which was made from 2mm wire.  Already I was having problems.  Sometimes my solder would ball up, sometimes it would flow onto only one side of the join.  It took many, many errors to find the right torch flame, the right way to move the torch flame, the right amount of flux, and the proper size to cut the solder.  There were tears of frustration, but it was going to get much worse.

Once the links were all soldered, the chain was to be annealed, and then drawn through a drawplate until the links were oval.  Just typing the previous sentence makes me shudder with the memory.  Possibly I did not anneal the chain to the right temperature, but it is more likely that my soldering was weak and imperfect, because I broke many, many links on this stage of the process.  I would go back to my bench, clean the join, reapply the solder, re-anneal the entire chain, then try to pull it through the drawplate again.  SNAP.  Another link breaks.  Repeat.  Repeat.  Repeat.  Soon every link had been soldered multiple times.  The instructor suggested I melt the entire thing down and begin again.  I remember the back of my throat being tight with frustration and rage, but I did as he suggested.

My second try was better than the first, but it was still substandard.  Soldering requires a certain knack, and to get the knack you require a lot of trial, error, and practice.  I got plenty of those three things over the next day or two because I had to melt down the chain again and begin with a melted piece of silver.

The third time is indeed a charm, and I had a chain of acceptable length which I now had to anneal and twist.  I already had PTSD by this point, and when I put one end of the chain in the vise and began to twist, I was ready to start pulling my hair out and running around the room screaming when I heard that "SNAP" noise as a solder join gave way.  But it only happened a few times (progress!  jubilation!) and I was able to salvage every broken solder join.

Fabricating the clasp was a cakewalk in comparison.  I sanded off any soldering overflow, and tossed the bracelet into the tumbler for a bit of barrel burnishing.  A few hours later, I took it out of the tumbler and.... it was all covered in black.  This is what happens when you don't clean your pieces very well before you put them in a tumbler:  abrasive media stirs up the rubber and then that rubber coats your piece.  NICE.  Our instructor, who was always calm and very collected, used this tribulation to teach us how to polish a chain safely on the polishing wheel.

Of all the time I spent in school, I believe that week or two was the most valuable to me as a metalsmith.  I came out of it really understanding how to solder, knowing all the things that could go wrong and many of the mistakes to avoid.  My classmates came to me for soldering help (I was surprised the first time this happened, and even more surprised that I knew what was wrong and how to make it work.)


I used the same chain again in my grad project, which was an exploration of pain and bondage.  I thought it was the perfect metaphor, connecting a pair of leather and silver cuffs, a silent testimony to the struggle I went through to learn the technique which brought the chain into existence!  It's still one of my favourite pieces of jewellery, and I wear it to remind myself to honour my mistakes.  Practice does indeed make perfect, or at least, brings you closer to perfection than you thought you could get.

Please visit my Etsy Metal teammates' blogs for further musings on the subject "Nobody's Perfect!":

Silentgoddess
2Roses
Inbar Bareket
Anne Walker
Beth Cyr
wildflowerdesigns
Michele Grady Designs
TK Metal Arts
Evelyn Markasky

Wednesday, March 7, 2012

Cultural Borrowing


I occasionally get asked why I so often use Japanese iconography in my work. As a white girl of mixed (but almost entirely European) heritage, why is it that I'm drawn to the art of a culture that's not my own? Is it curiousity, fascination, or something deeper than that? Growing up in Canada, we are taught that we belong to a country that is a multicultural "mosaic". It sounds pretty, and if you live in or visit a large city in Canada, you have the opportunity to see the mosaic. Growing up in northern Saskatchewan, however, this mosaic is much more monocromatic. I wanted to see something else. It could have been India, or Thailand, or Brazil or Zimbabwe. I have romantic ideas about all of these places. But nothing approached the sort of crush I had on Japan.

その脂肪外人を見てください!

First off: photographic proof that I lived in Japan. My friend and student Masayo once taught me how to behave at a tea ceremony, dressed me in a kimono and took me out for some world class matcha and mochi and we listened to some koto music. There was a beautiful garden and plum blossoms and ladies wearing kimonos and my eyes grew accustomed to the things I saw when I was there.

I spent one year in Japan, and soon afterward, I flew away to art school to learn about metalsmithing and jewellery. The girl at the bench beside me was
a hippie who designed much of her work around tribal Maori iconography. The guy behind me was a Haida indian who used his culture as inspiration for his beautiful jewellery. Behind him, a girl from Hong Kong who designed a gorgeous miniature wedding carriage using Chinese characters. I realized that everyone has their muse. It might be a current fascination or a deep cultural well of inspiration. But we've all got something that gets us.

As for me, Japan kept popping up in my designs, someti
mes sublty, sometimes in a more overt way. It's rarely a conscious design decision - I just sit down to practice a technique like cloisonne, and the floral motif that I choose consists of things I saw on kimono fabric or on a fabulous package of chiyogami paper:


It's just an aesthetic that I find pleasing to my eye! I wonder where I should travel next and how the wealth of another culture's arts and traditions will shape me artistically. Perhaps I should just spin my globe and see where it stops...

Thursday, January 26, 2012

Doing Good

Last week I heard an inspiring story . Christian Kongawi, who lives in my hometown of Saskatoon, Saskatchewan, was putting together a fundraiser including a dinner, concert, and silent auction to help him in his quest to build a school in the Congo. His personal stake in this endeavour? His family is Congolese and his parents sent him to Canada as a ten-year-old boy to spare their son the strife of that very conflict-ridden area of the world. After his move to Canada, Christian's village, Gemena, was attacked and the school there was damaged. Christian is now 25 years old, and his plan is to return to Gemena and rebuild his school and help the community.

This is a huge undertaking, and one he has been planning for a long time. I can't really even imagine the determination and guts required to pull an idea like this together, and I was really inspired by his dedication. I wondered if there was something, however small, that I could do to help out. The words "silent auction" popped out at me, and there was my idea. I would make a necklace and donate it to the cause. I had a few days to do it, but I knew my motivation could drive me to get it done.


Ta-da! Now I can only cross my fingers and hope that some kind soul likes it enough to place a generous bid for the kids of Gemena!

I bow to the motivation and determination of people like Christian, who have a clear idea of what it would take to make something in this world better, and who find the energy to make a plan and carry it through. I understood a little bit about the source of this motivation when I sat down to make this piece of jewellery. Normally when I'm working on a commissioned piece, my motivation comes from my joy of crafting, but it's tempered by time constraints and by knowing that, above all else, I'm crafting for money. I'm lucky to do what I love, and it's wrong to complain about it. But when I was making this necklace, I felt a much purer motivation, one that was seemingly inexhaustible. I sat at my bench with joy, just knowing I was going to give a small piece of myself to a much larger and more important cause than "me".

Good luck, Christian!!

Thursday, January 19, 2012

More Adventures in Enameling - Pagoda Pendant Tutorial


I decided to try using adhesive plastic stencils that I picked up from the dollarama to apply a design in enamel to a pendant. I just designed the pendant as I went along, so there was no sketching or planning process - I just let the creativity flow! It's fairly easy to do with a few basic metalsmithing techniques, so I've documented the process and outlined it here if you wish to do something similar.

I always make sure I'm wearing a good particulate mask when I'm sifting enamel. Trust me, you don't want to get silicosis . If you were a smoker and decided to quit today, your lungs would immediately begin to heal themselves. Inhaling glass is something your lungs can't really recover from. Be safe! (And that mask is pretty cute, too, isn't it!)


Here is my one-dollar sticker from the dollarama. I'm extremely happy I picked these stencils up, even though I wasn't sure what i was going to do with them at the time. You can make your own stencil if you want - just cut your negative space from paper with a craft knife or paper punches, and use Klyr fire to "glue" your stencil down before you sift your enamel on.

After washing my copper rectangle so that water flowed over it in a sheet and didn't ball up anywhere or pull away from the edges, I applied klyr-fire, sifted counter enamel over the piece, set it on top of the kiln to dry, then fired it until the glass flowed. I did another layer of counter enamel and two layers of black enamel on the right side of the piece before I applied my sticker. I left a little tab at the top of the sticker when I trimmed it to size so that I'd be able to easily remove it. Don't be tempted to skip the counter-enameling. Your piece will likely warp or crack if you don't have relatively equal amounts of enamel on both sides.

I brushed Klyr fire over the black parts that were showing through the stencil (if you've made your own stencil, there is already organic binder on the piece) and sifted blue enamel over the entire rectangle. I turned the piece upside-down and gently pulled the stencil off. Some blue enamel flaked onto the black spaces in between the design, but I simply brushed those off with a damp, fine artist's brush. I was surprised how little cleaning up I had to do after the sticker came off. I let the piece dry, and then fired it in the kiln.


It looks pretty good! That was considerably easier than I expected it to be. Next I had to make a setting for the enamel.


I decided to go with a fairly basic bezel shape, with the intention of possibly adding embellishments. I had some silver-filled sheet that I was eager to try working with, so I cut a rectangle the same size as my enamel, and bent some fine silver bezel wire to fit around the outside of the base. This is the hard way to make a bezel. Typically I would fit the bezel wire around the enamel, then solder it on top of the metal sheet before I cut the sheet out - but I didn't want the line of brass from the silver-filled sheet to be visible around the side of the bezel, so I had to cover the edges with the bezel wire. This requires a pretty tight fit and a bit of a finicky soldering job, but I got it done!


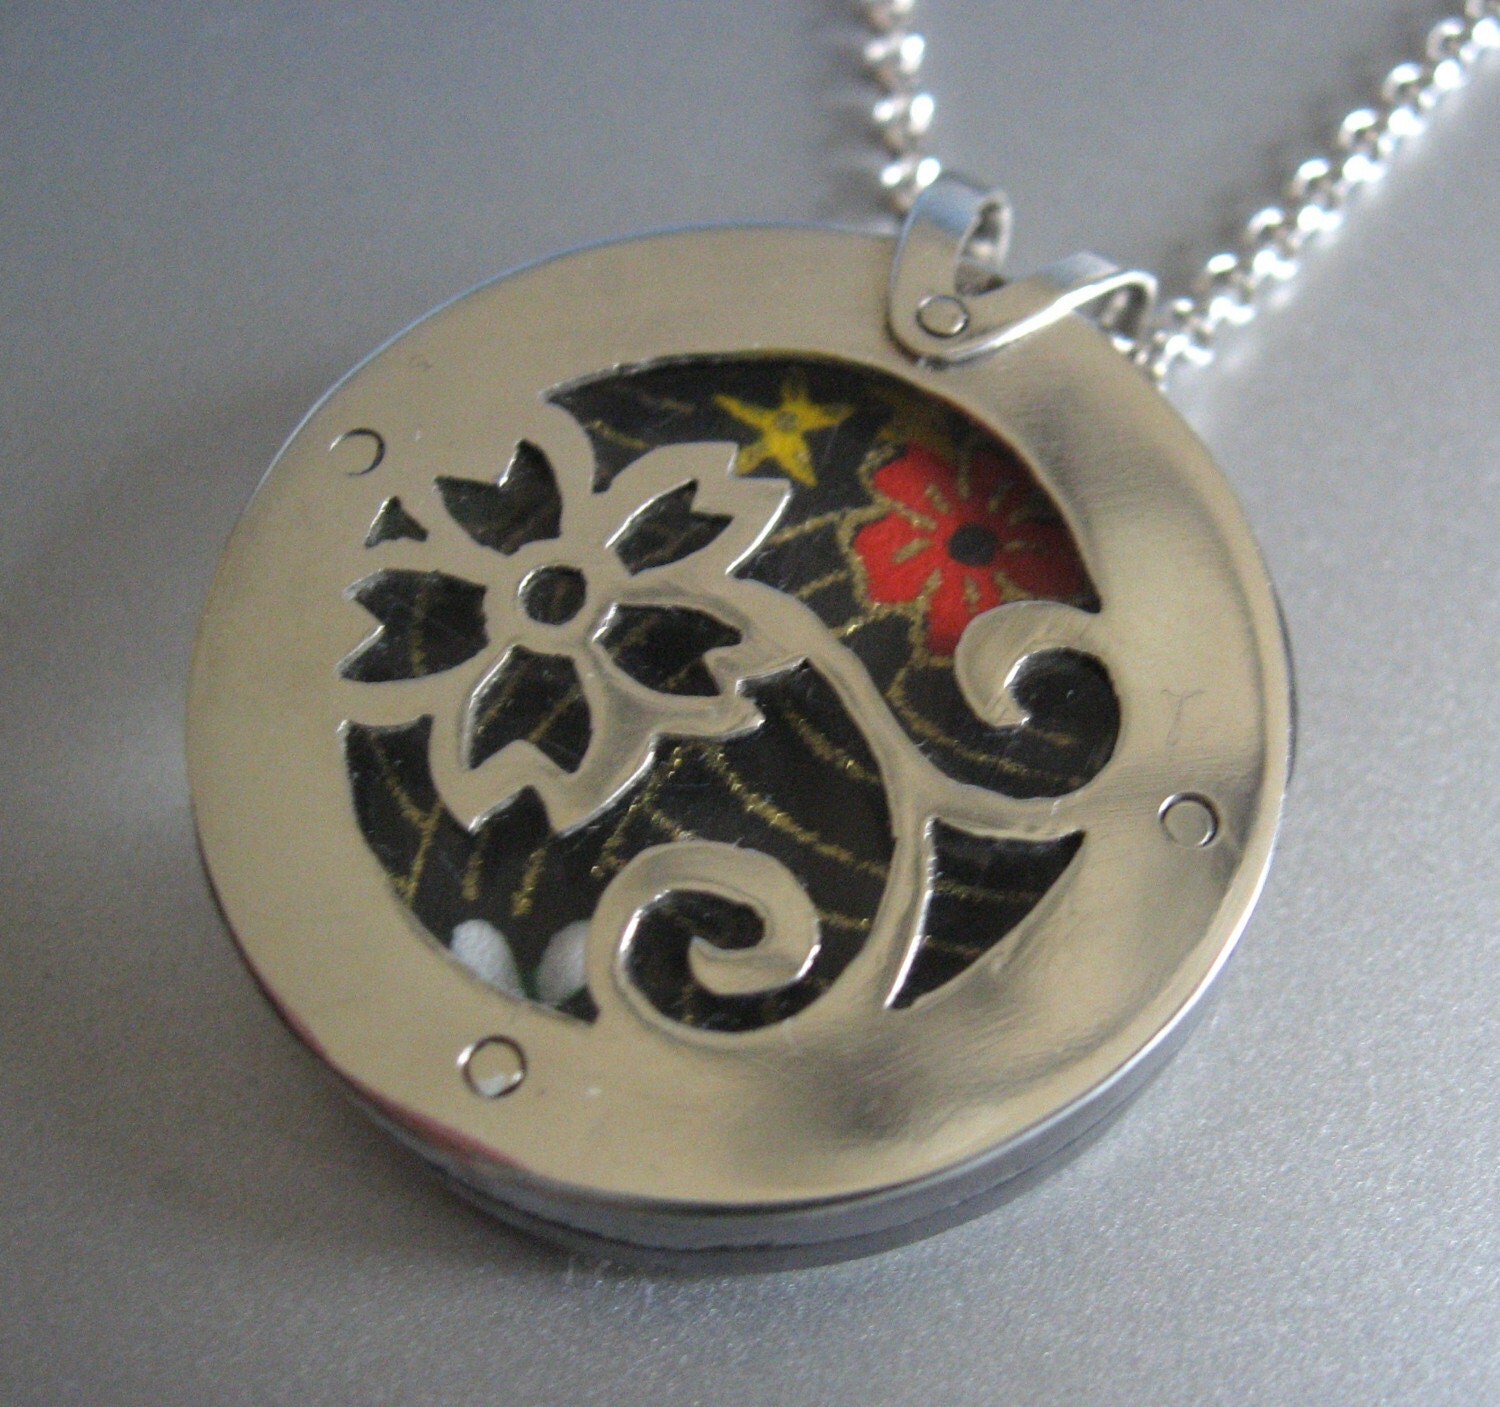
After soldering and pickling my bezel, I realized that it was boring. I decided to replicate a part of the enamel design on the back of the bezel and pierce it out. It was fun to design this piece on the fly and to make decisions about the design spontaneously. Normally I sketch things out and have a pretty good idea what I want to do before I start, but it's nice to work with only a nebulous beginning sometimes.


I like asian-themed design, and it seemed appropriate for this piece to have an arrangement of wires with a pagoda look on top of the pendant. Soldering these in place was a bit difficult because I was using only a small torch, and the entire piece needs to be heated at the same time for solder to join properly - the large bezel likes to steal heat away from the thin wires at the top. I switched from my creme brulee torch to the propane fat boy and was able to accomplish the soldering with only a few minor glitches.


I did take a few pictures of the fabrication of the bail, but they turned out blurry, so I'll have to do a separate tutorial for bails sometime in the future. I applied a finish that is a bit rough by using emery paper in small circles on the back of the bezel, and in straight lines for the wires, bail, and bezel walls. Placing the enamel in the bezel, I noticed that the counter enamel was not a very nice colour, and since I had sawn the design into the back, the counter enamel was showing through. I decided to put one last coat of enamel on the backside of the piece in black. Then the enamel was ready to set! I used a bezel roller to close it up nice and tightly and then I burnished the edges so they were close around the enamel.


I like it when the back of the piece has a little something extra. It's like a happy little secret for the wearer!

Sunday, January 15, 2012

It's All Practice


Inspired by a recent tutorial in Art Jewelry magazine written by Lillian Jones, I decided to do some cloisonne enameling. Enameling was my favourite elective when I was in art school, and cloisonne is one of the most striking enamel techniques. But wait! I haven't done any cloisonne since I finished school. Should be a cinch, right? I needed some preparation!

First: I make a trip to the library to check out The Art of Enameling by Linda Darty. It's an awesome primer for enameling that I remembered reading when I was in school. I took the book to a sushi restaurant and boned up on my technique while sipping my miso soup. Mmmmm!


Second: Dive in. I fired up my beehive kiln (I LOVE my beehive kiln!), chose my enamel colours, punched out some copper discs with my disc cutter, domed them with my dapping set, drilled holes so I could hang my samples later, and counter-enameled the backs of my discs. So far, so good!

I hit my first snag when I tried to emboss a nice pattern into my fine silver foil. The pattern appeared when I rubbed it on a patterned brass sheet, but the design flattened considerably when I glued it to the copper with klyr-fire. Presumably my silver foil is thinner gauge than I should be using if I want to keep a nice pattern. It still looked nice, so I kept going.

Next I laid out my cloisonne wires. This is fun, meticulous, and meditative. If you have somewhere to go or something else you need to get done today, don't do cloisonne enameling! You need to feel like you can take your time, so do it on a Sunday or on your day off. It took me a while to get them laid out. I glued them down as I went along with klyr-fire, but it's tricky at times. I soon got the knack. I was working freehand - next time I will design and follow a pattern.

I dropped my piece when I got it near my kiln. Wires flew everywhere. I may have said a few blue words, and right at this moment, my boyfriend got out of bed and approached me for some sort of snuggle or something. I told him to get lost! He sulked and went back to bed. But I digress.

It didn't take long to get the wires glued back down and fired to the piece. Then I began the work of filling in the cells with enamel. Ok, I forgot to wash my enamel. I was so excited to begin that I just started without washing the colours like you are supposed to. It worked out fine until my second or third firing. I was using a small plastic palette for my enamels, and Saskatchewan is very dry and the air here is staticky. What this means for my enamel is that small particles jumped up and into other colours when I scooped them into the palette, just before I wet them with water and klyr-fire. So my transparent colours are a little contaminated with black speckles. Yuck. Lesson learned: next time I'm going to buy shot glasses from the dollar store and keep each colour separate (and clean them well before I start working with them!)


When I had built up the enamel to the height of the wires, It was time to stone the wires down with an alundum stone. I had to stone so much down around the tips of the petals that I lost most of the enamel from those areas! This is a design flaw. I should have made my disc larger or my flower smaller, or I could have bent my cloisonne wires better so that they fit the deep curve of the dapped disc better. This last option was the one I chose for my second try, and It worked a lot better.

I made my final mistake when I put a "clear" coat of enamel over the entire piece. The clear didn't turn out to be very clear at all, but an ugly, milky colour. (I know, I should have washed it - the lesson has been learned!) I also covered up the hole with enamel. At this point I'm realizing that I am NOT a pro. My alundum stone gets a mighty workout as I grind the top layer off, then I use a diamond bit to burr out the hole. I fire the piece one last time to bring it back up to a nice, smooth shine, and voila! I have done it.

Now, with the lessons I have learned from this fumbling enamel excursion, I tried another flower - a blue one. The second sampler worked out better than the first, which gives me a satisfying feeling of progress. I didn't want to just hang the samples on the wall, so I made some wire connectors and a bail and created a pretty little pendant.

I did get a little angry with myself because I expected to be amazing right out of the gate, but at the end, I had to remind myself that everything I do is just practice for other things I'm going to do. The more practice, the better those future things are going to turn out.